HySecurity Oval Arm Boom Assembly & Installation
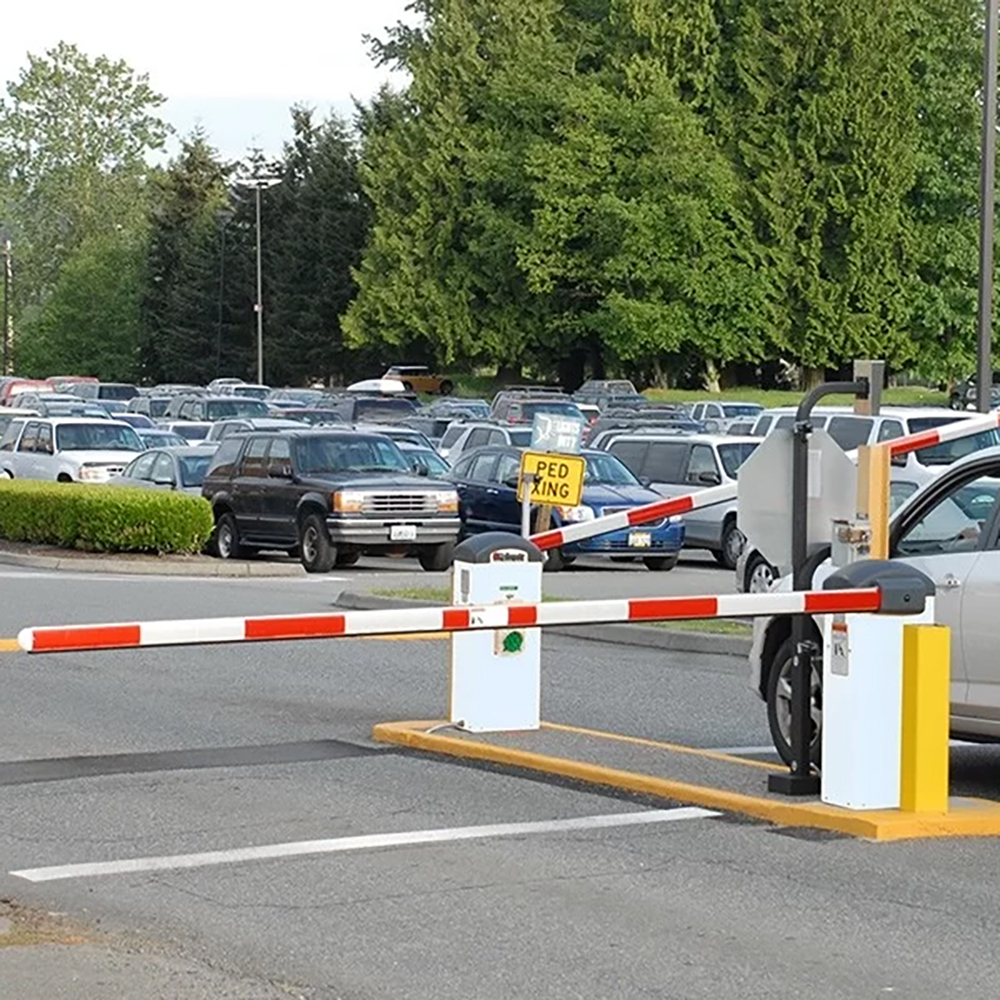
The HySecurity Oval Arm Boom is a necessary part designed for traffic control and parking management. Its installation requires careful attention to detail to ensure maximum effectiveness and compliance with safety standards. This guide will walk you through a thorough step-by-step process, covering every aspect of putting it together and setting it up. By following these instructions, you can ensure a smooth setup while avoiding common pitfalls that might cause operational issues or safety hazards. Whether you are a professional installer or handling this as a do-it-yourself project, these steps will help you complete the process correctly.
Tools Required
- Utility knife
- Standard socket set
- Standard hex key set
Step 1: Preparing for the HySecurity Oval Arm Boom Assembly Installation
Before beginning the installation, it is important to ensure that you have all the necessary tools and parts at hand. Taking the time to review the installation manual and familiarize yourself with the instructions can save time and effort in the long run. If you are installing an articulating arm, be sure to consult the additional documentation that comes with the kit, as there may be specific details unique to that setup. Ensuring a clear workspace and organizing all parts before beginning will simplify the entire process.
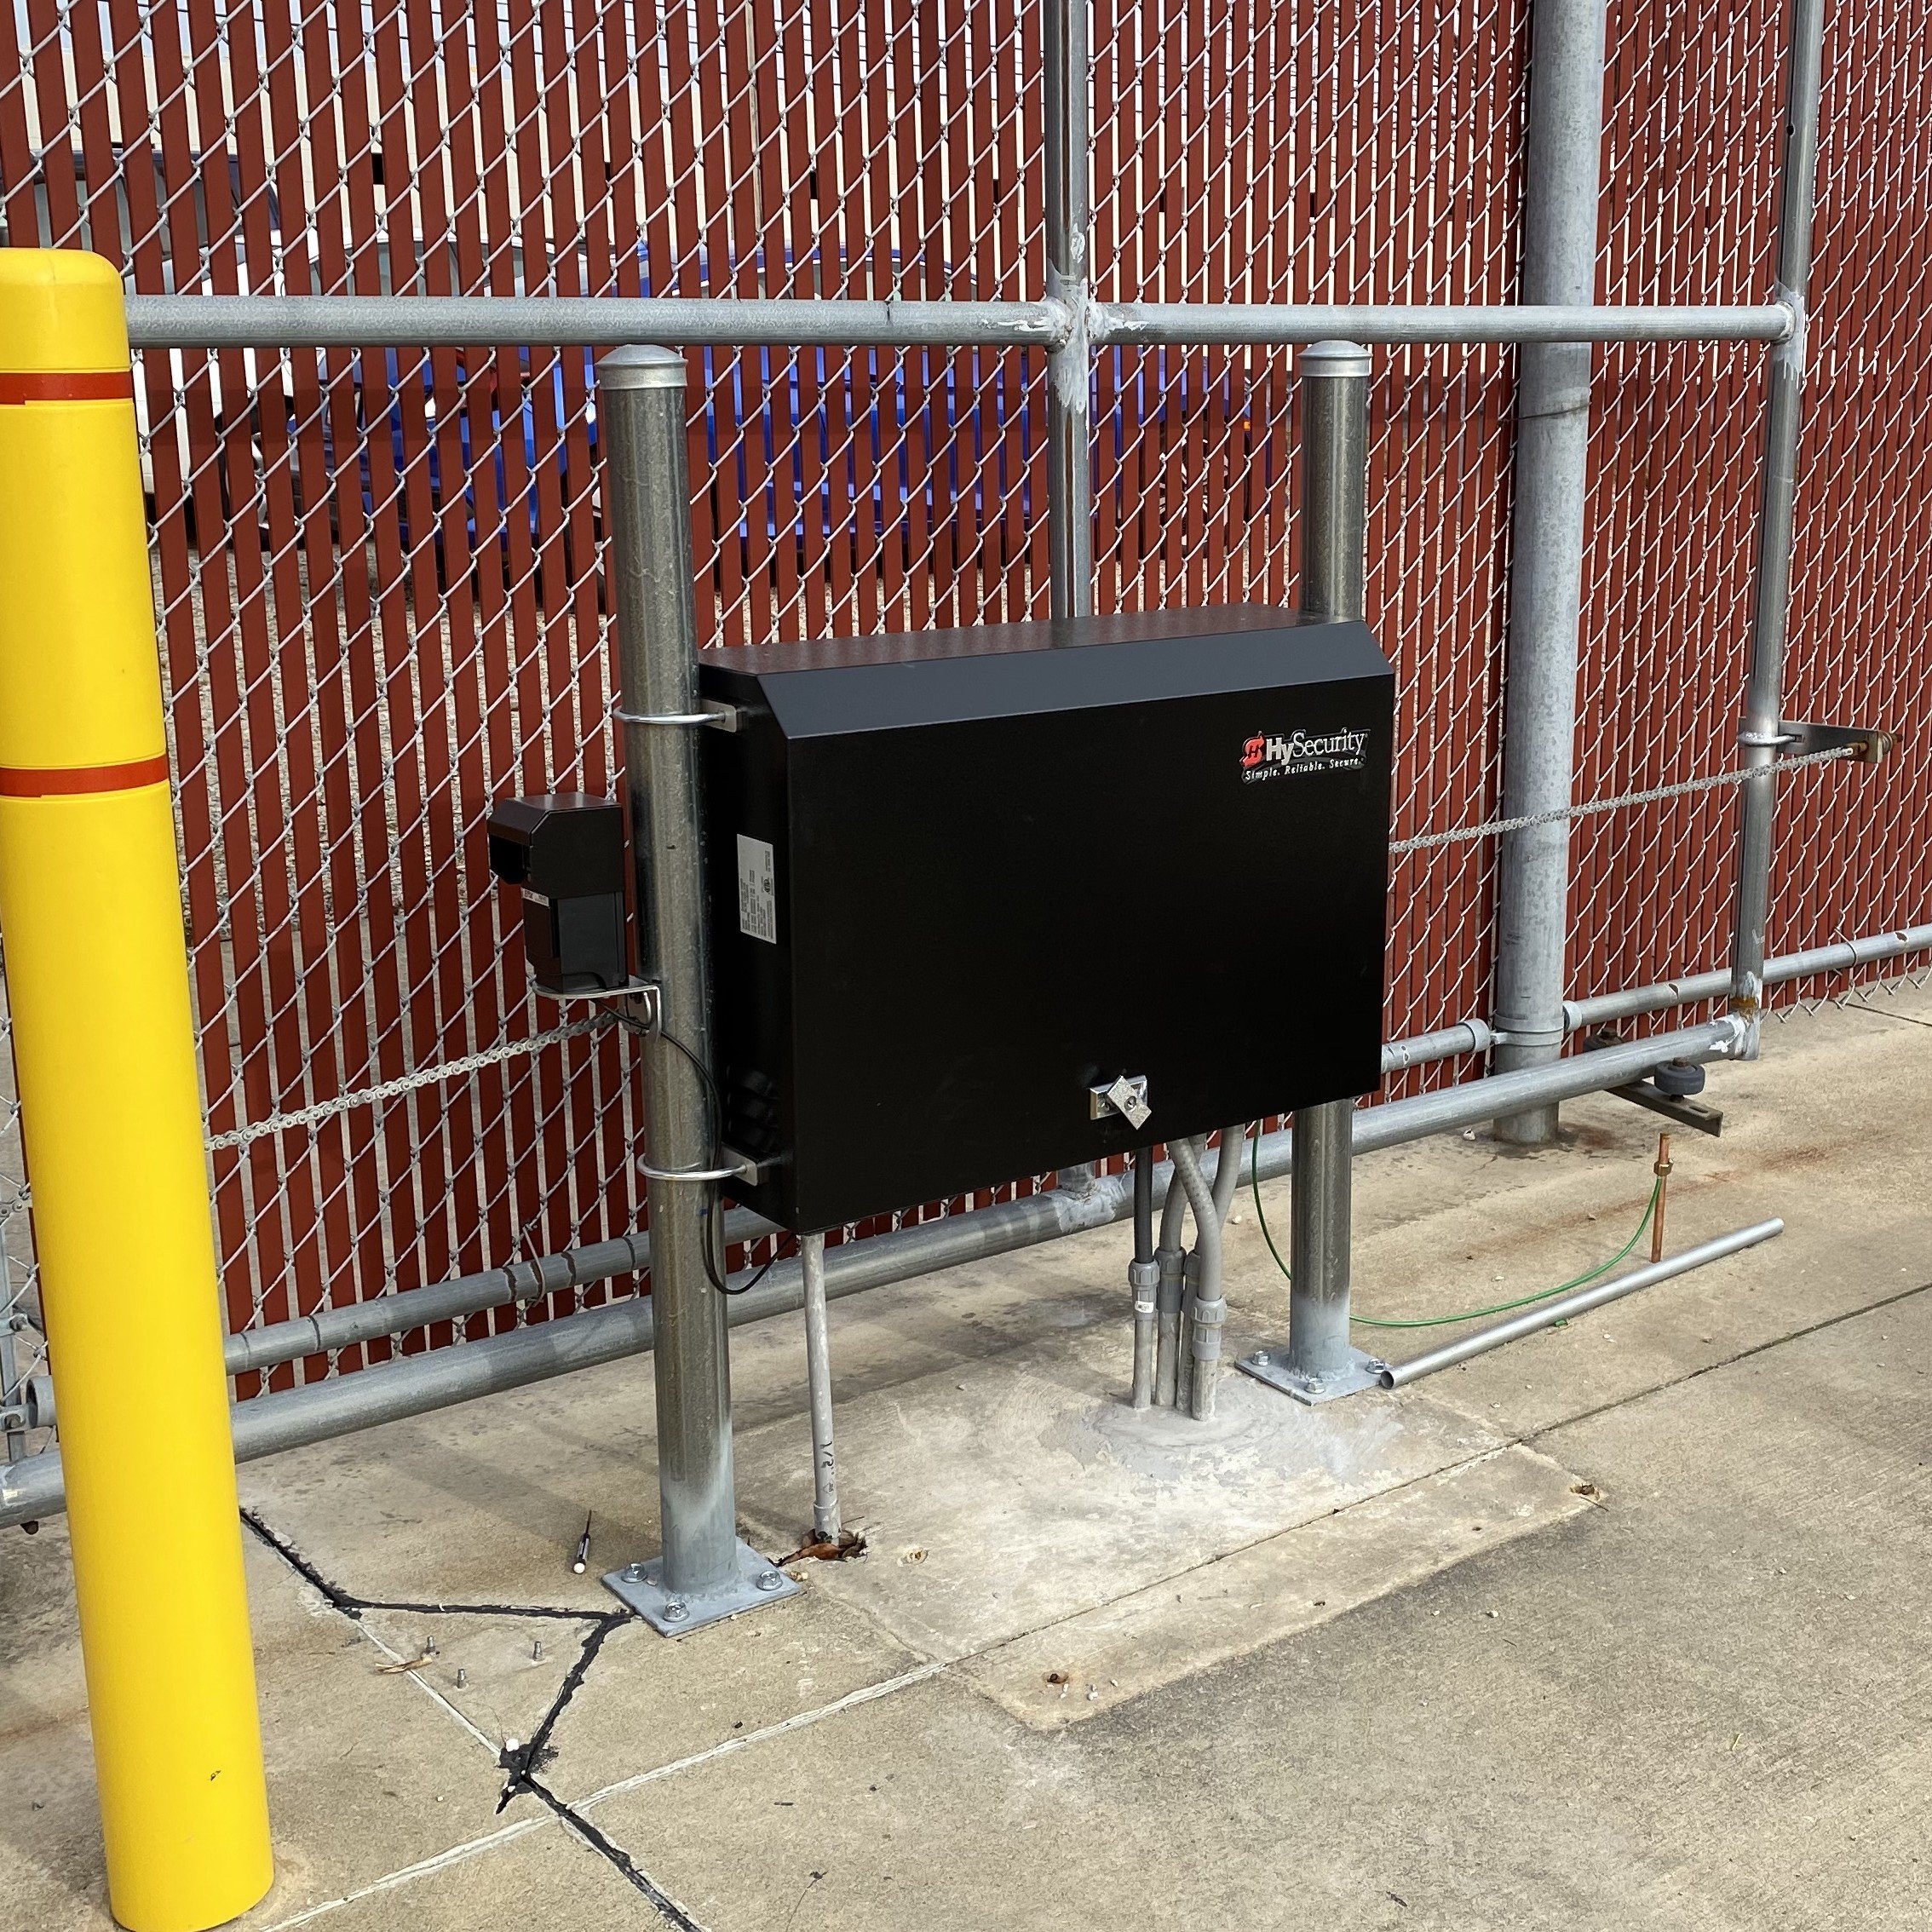
Step 2: Powering Down the HySecurity Barrier Arm Opener
For safety reasons, it is vital to turn off both the AC and DC power switches before proceeding with the installation. This precaution prevents any accidental activation of the barrier arm, which could lead to potential injuries or damage. It is always a good practice to double-check the power source and ensure that no unintended electrical connections remain active before handling any of the machine's parts. Taking this simple yet important step ensures a safe working environment and reduces the risk of electrical hazards.
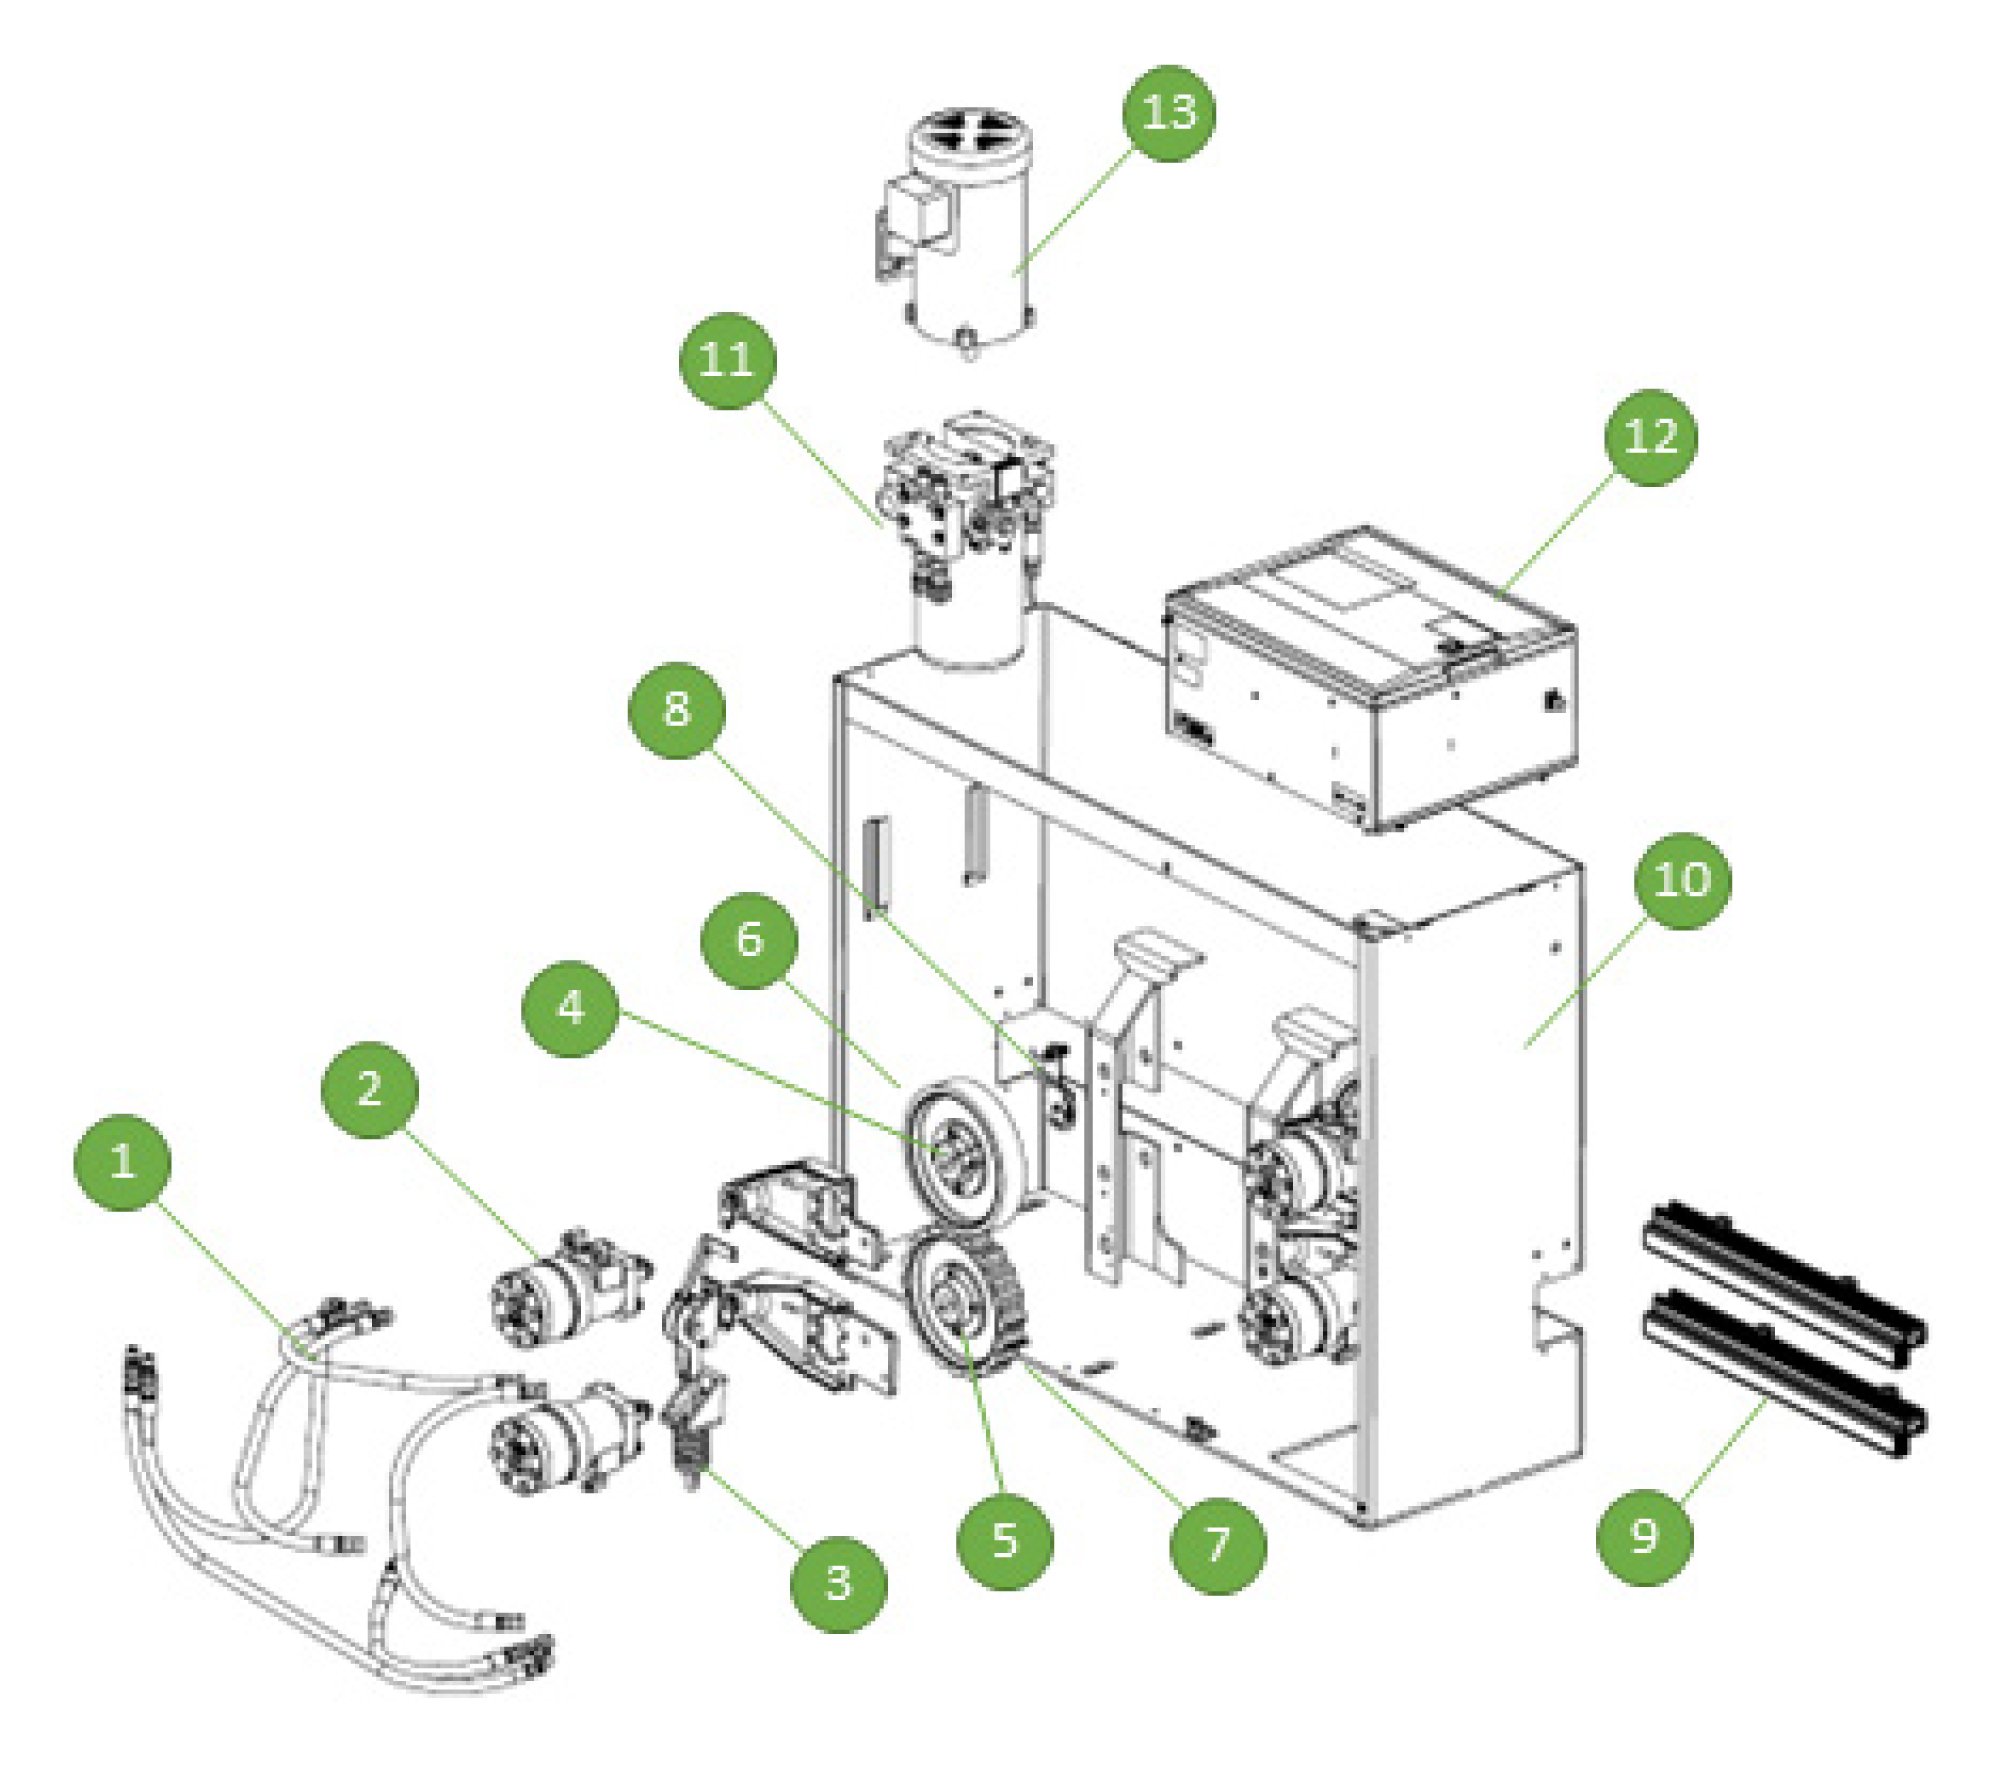
Step 3: Installing the Breakaway Arm Mount
- Begin by positioning the Breakaway Arm Bracket in place, making sure that the clamp opening is facing upwards. This orientation is important for proper alignment and secure attachment.
- Carefully remove the Physical Stop Bracket by unscrewing the four fasteners that hold it in place. Ensure that all removed parts are kept in a safe location, as they may be needed later during the installation process.
Step 4: Connecting the Battery Wire to the HySecurity Oval Arm Boom Assembly
At this stage, it is necessary to connect the red battery wire to ensure proper functionality of the machine. This step corresponds with step 4 in the installation manual and must be executed precisely. A secure battery connection ensures that the gate operates smoothly and without interruption. Double-check the wiring for any loose connections, as poor contact can lead to operational issues. Additionally, ensure that the wire is properly insulated to prevent any electrical short circuits.
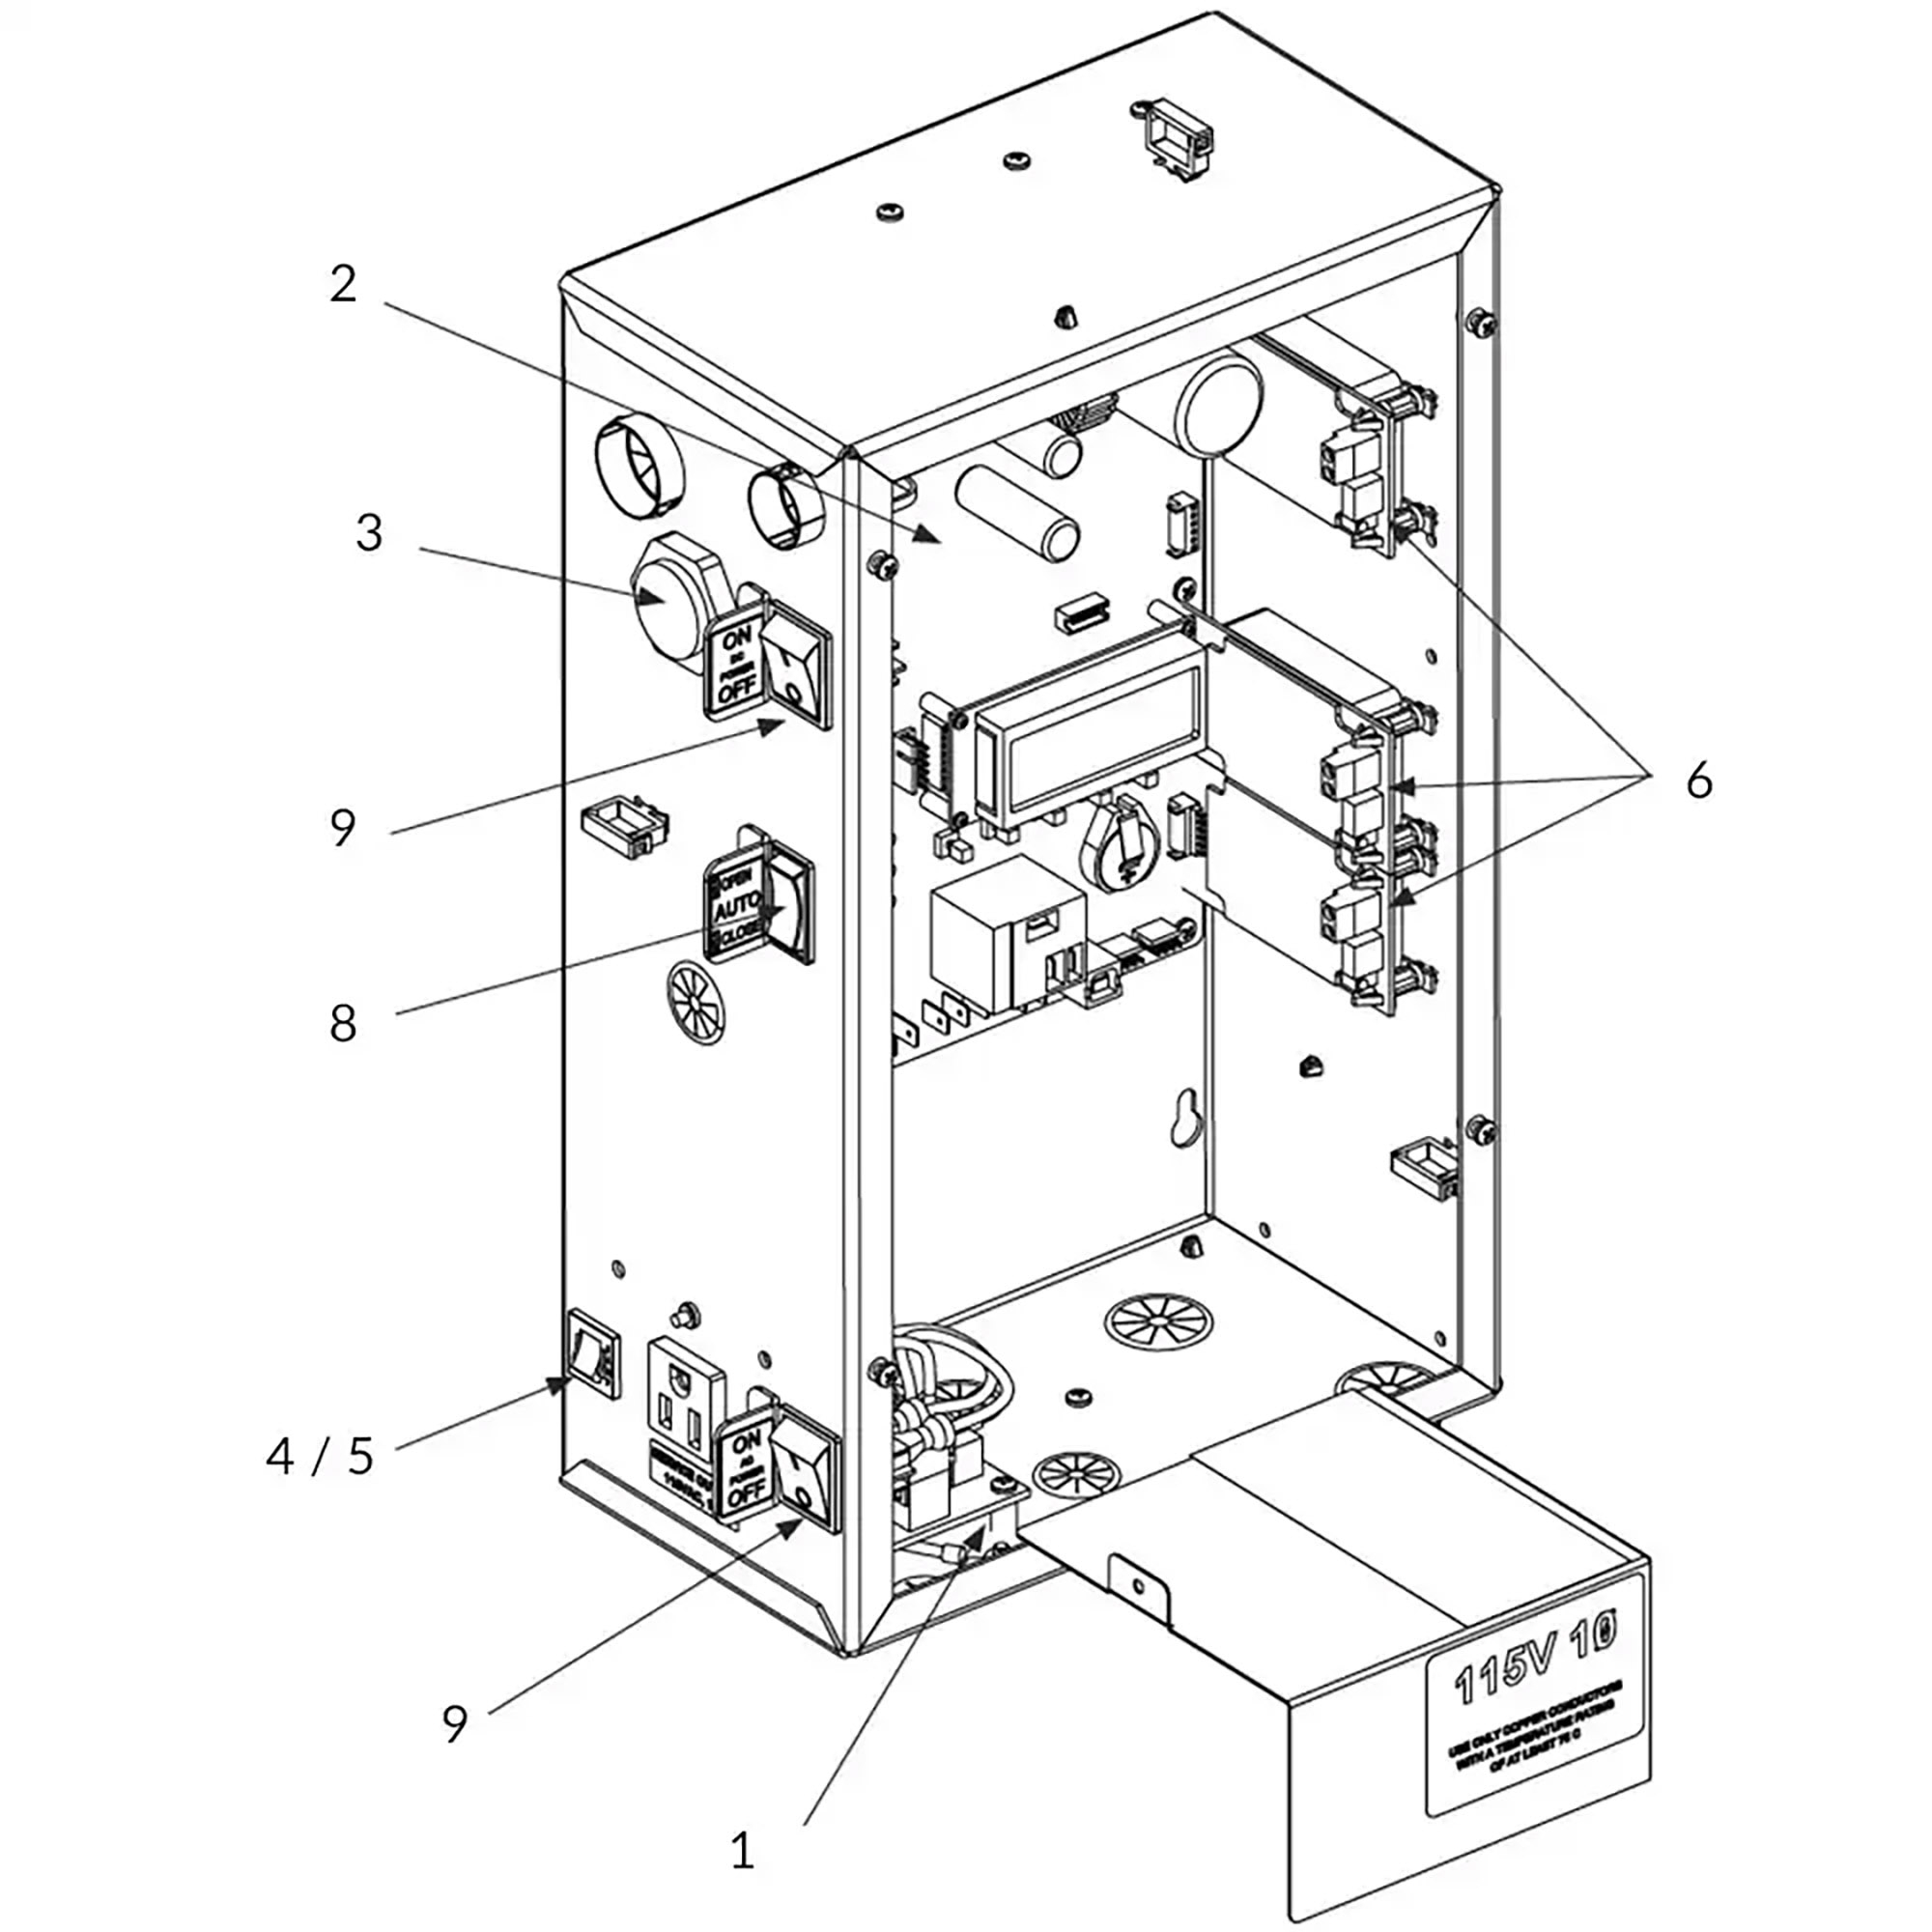
Step 5: Powering On & Testing the HySecurity Oval Arm Boom Assembly
- Turn the DC power switch ON to initiate the startup sequence. Ensure that all connections have been made correctly before proceeding.
- Next, toggle the HOLD switch to the "Hold Open" position. This setting allows for an initial assessment of how the machine is functioning.
- Observe the display and wait for the message "GATE OPEN" to appear. This confirmation indicates that everything is operating correctly.
- Once the gate has fully opened, turn the DC power switch OFF to conclude the test phase.
Step 6: Securing the Clamp
Now, carefully slide the clamp onto the drive shaft, ensuring that the gear teeth align properly against the chassis. Misalignment at this stage can cause performance issues and increase wear and tear on the parts. Once the clamp is in place, perform a visual inspection to confirm that it is flush against the shaft and not skewed at an angle. Properly aligned gear teeth ensure smooth operation and prevent unnecessary stress on the mechanical parts.
Step 7: Finalizing the HySecurity Oval Arm Boom Assembly Installation
- Secure the clamp in position using the provided fasteners. Make sure they are tightened appropriately to prevent any movement during operation.
- If necessary, adjust the spline collar bolt & nut to fine-tune the clamp's positioning. Once aligned correctly, re-tighten the bolt to lock it in place securely.
Step 8: HySecurity Oval Arm Boom Assembly Safety Warnings & Compliance
To comply with UL 325 safety regulations, it is important to place warning labels on both sides of the barrier arm. These labels serve as a reminder of potential hazards and ensure that all users are aware of the safety precautions they must follow. Failure to apply these warnings could result in non-compliance, leading to potential legal liabilities in case of an accident.
Important Safety Notes:
- Always stay away from the barrier arm drop zone, as the arm may move unexpectedly without prior warning.
- Moving arms can cause significant vehicle damage, serious injury, or even death if not handled properly.
- Children should never be allowed to operate or play near the barrier arm to prevent accidental injury.
Step 9: Reviewing the HySecurity Oval Arm Boom Assembly Installation
After completing the installation, take a moment to review your work and ensure that all parts are securely fastened and properly aligned. To further verify the setup, watch the official installation video available at: Installation Video. This video provides additional insights and visual confirmation of the correct installation procedure. By following the instructions and cross-checking with the video guide, you can be confident that the barrier arm is set up correctly and ready for use.
Frequently Asked Questions about the HySecurity Oval Arm Boom Assembly
How Long Does Installation Take?
Installation time can vary depending on experience and familiarity with the equipment. On average, it takes around 1-2 hours for a professional installer. If you are new to the process, it may take longer as you carefully follow the instructions. Ensuring all tools and parts are ready beforehand can significantly speed up the process.
What Should I Do If The Arm Doesn't Move?
If the barrier arm does not move, check that the power switches are on and that the battery is properly connected. Additionally, inspect the wiring for any loose connections or damage. The display panel should indicate any error messages that may help diagnose the problem. If issues persist, consult the troubleshooting section of the manual or contact support.
Can The Boom Arm Be Used In High-Wind Areas?
Yes, but additional precautions may be necessary. High winds can put extra stress on the boom arm, potentially affecting performance. It is recommended to remove the barrier arm if high wind warnings are in effect. Some installations may benefit from additional stabilizing accessories to reduce wind impact.
How Do I Maintain The Boom Arm?
Regular maintenance is crucial for long-term performance. Inspect the fasteners and moving parts periodically to ensure they are secure and in good condition. Clean the arm and surrounding areas to remove dirt and debris that may interfere with operation. Checking the battery and electrical components regularly will also help prevent unexpected failures.
Is Professional Installation Required?
No, but it is recommended for those unfamiliar with the process. A skilled individual can follow the guide to complete the installation successfully. However, professional installation ensures that everything is set up correctly and safely. If you have concerns about wiring, alignment, or safety, hiring an expert may be the best option.
Contact Us
At Secure Openers, we are committed to providing you with the best support for all your HySecurity Oval Arm Boom needs. Whether you have questions about installation, need technical assistance, or require product recommendations, our team of experts is ready to assist you. Contact Us Today!
Contact Us Shop HySecurity Oval Arms